
192.168.9.1 is a default management address used by some routers, portable Wi-Fi devices, and networking equipment, including certain Hikvision models. Although it is not as widely used as 192.168.0.1 or 192.168.1.1, many devices still rely on this address for admin access.
When a router or network device is brand new or has been restored to factory settings, it must be set up before it can connect to the internet.
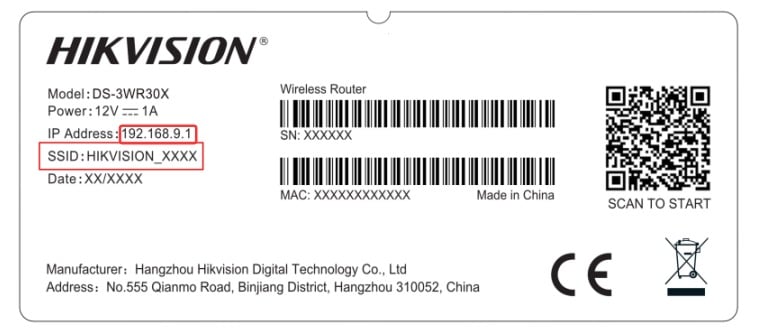
If your device shows 192.168.9.1 as the default gateway—or the label on the bottom of the router lists it as the management IP address—you can follow the steps below to complete the network setup.
This guide uses a Hikvision router as an example, but the setup process is similar for most other brands.
192.168.9.1: How to Set Up Your Router for Internet Access
1. Connect Power Supply and Internet: Plug the router into a power outlet and turn it on. Then connect the Ethernet cable from your modem’s LAN port to the router’s WAN port so the router can receive the internet signal and distribute it to your home devices.

2. Wait for the router to fully start: Check the indicator lights on the router. A steady power light means the device is powered on, while the WAN/Internet light blinking or turning on indicates that the router is detecting the internet connection. Wait about 30 seconds until the lights stabilize.
3. Connect to the router’s network: Use your phone to connect to the router’s default Wi-Fi network, or connect your computer using an Ethernet cable (LAN port) or the default Wi-Fi. Make sure your device is on the same network as the router. Hikvision routers typically use a default Wi-Fi name (SSID) such as HIKVISION_XXXX, which can be found on the label on the router.
4. Open the setup wizard: After connecting to Wi-Fi, the setup page may open automatically. If it does not, open a browser and enter http://192.168.9.1 in the address bar to go to the setup page.
Note: Avoid incorrect formats such as http//192.168.9.1, htp://192.168.9.1, http://192.168.9.l, www.192.168.9.1, or http://192 l.168.9.l, as these errors may cause the 192.168.9.1 router login page not to open.
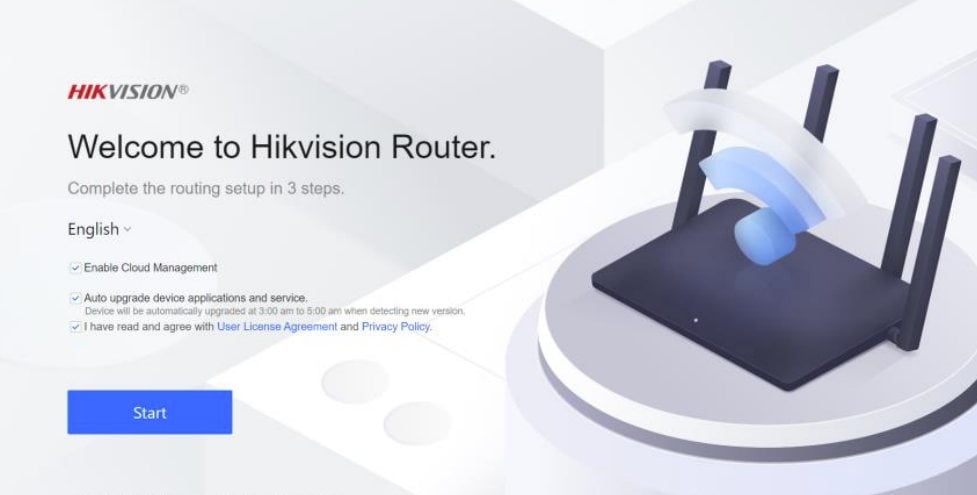
5. Configure the internet connection: Click “Start”. The system will automatically detect the internet access mode, or you can select it manually based on your internet service.
DHCP: It is recommended to select this mode. Dynamic IP address will be allocated automatically. No additional configuration is required.
PPPoE: You can select this mode if your Internet Service Provider (ISP) has provided a broadband account and password, or if you are going to use a new router to replace the old one.
Static IP Address: It is not recommended to select this mode, unless your ISP has provided a static IP address and other information.

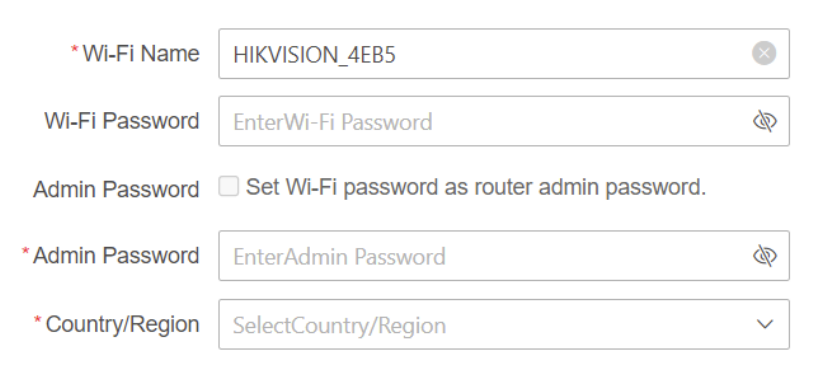
6. Set the Wi-Fi name and password: Follow the on-screen instructions to configure your wireless network name (SSID) and Wi-Fi password. You will also need to set the router’s admin login password and country/region. Some routers allow you to select “Set Wi-Fi password as router admin password”, which eliminates the need to create a separate login password.
Tip: For better security, it is recommended to keep the admin password different from the Wi-Fi password. This also makes it easier to change your Wi-Fi password later without affecting router login access. Be sure to write down your passwords right after setting them. For more details, see: 192.168.9.1 Login: Default Admin Password and How to Reset It
7. Complete setup: Click “Next” to complete. The router will automatically restart, and your internet connection will be ready. Then, search for your Wi-Fi network and connect using the password you just set. Enjoy fast and smooth surfing!


