FAST routers are affordable, stable, and easy to set up—perfect for student dorms, rental apartments, or home broadband use. Once you’ve got your FAST router, the first step is to access the admin interface and configure your internet connection and Wi-Fi. Follow this complete guide to get your FAST router online in just a few minutes.
Step 1: Connect Your Router
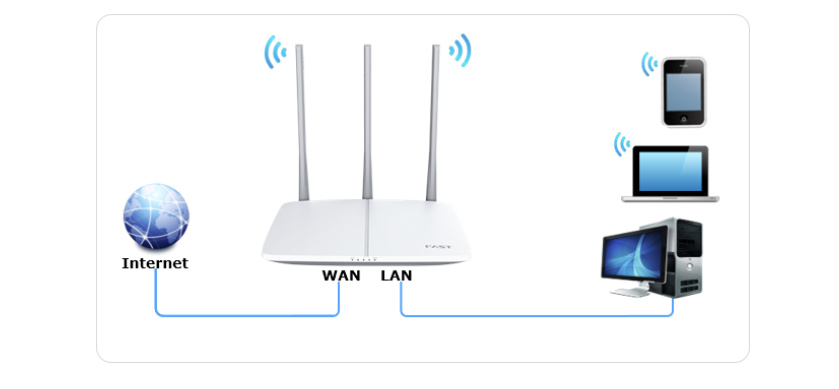
Before you start, make sure the router and your device are properly connected:
1. Power on the router. Plug it in and wait for the indicator lights to turn on or blink. That means your device is up and running.
2. Connect your device. Use your phone or computer to connect to the router’s default Wi-Fi signal—usually named FAST_XXXX (where XXXX is a mix of random letters or numbers). If you’re setting up from a desktop PC, connect the Ethernet cable to the router’s WAN port (the port that connects to your modem).
3. If using a phone, disable mobile data (4G/5G). Otherwise, your browser might use cellular data and fail to open the router’s setup page.
Step 2: Log In to the FAST Admin Page
1. Once connected, open your browser and type one of the following addresses into the address bar: 192.168.1.1 or 192.168.1.253.
2. After a few seconds, you’ll see the FAST router login page. If this is your first time setting it up, you’ll be asked to create an administrator password (also known as the router login password). This is not your Wi-Fi password—it’s only used to access the router’s settings.
3. Once you’ve set your password, click “OK” to enter the setup wizard automatically.
Step 3: Choose Your Internet Connection Type
After entering the setup wizard, the router will automatically detect your connection type. Follow the on-screen prompts and enter any required information. There are three common internet connection types:
1. PPPoE (Broadband Dial-Up)
If your internet provider (such as China Telecom) gave you a broadband username and password, choose this option.
Enter your broadband account and password, then click “Next.” Once the connection succeeds, the top-right corner will show “Internet Connected.”
2. Dynamic IP (DHCP)
If your router is connected to another router or an optical modem (for example, in dorms or offices), choose “Obtain an IP address automatically.”
No username or password is needed—just click “Next” to save your settings.
3. Static IP
In some workplaces or special network environments, your provider may give you a fixed IP address along with gateway and DNS details. In that case, choose “Static IP” and enter all the required information manually.
Step 4: Set Up Your Network Name and Password
Once the internet connection is configured, you’ll be taken to the Wi-Fi setup screen.
Here’s what to do:
Set a network name (SSID), for example: WDJ2025_5G
Set a Wi-Fi password (use at least 8 characters with a mix of letters and numbers for better security)
Double-check your network parameters, then click “Confirm.” Your Wi-Fi name and password will now take effect.
That’s it! Your FAST router setup is complete. Connect your phone, laptop, or other devices to the new Wi-Fi network, and you’re online!
My Fritz.Box Login Step-by-StepGuide
If you need to access your Fritz.Box