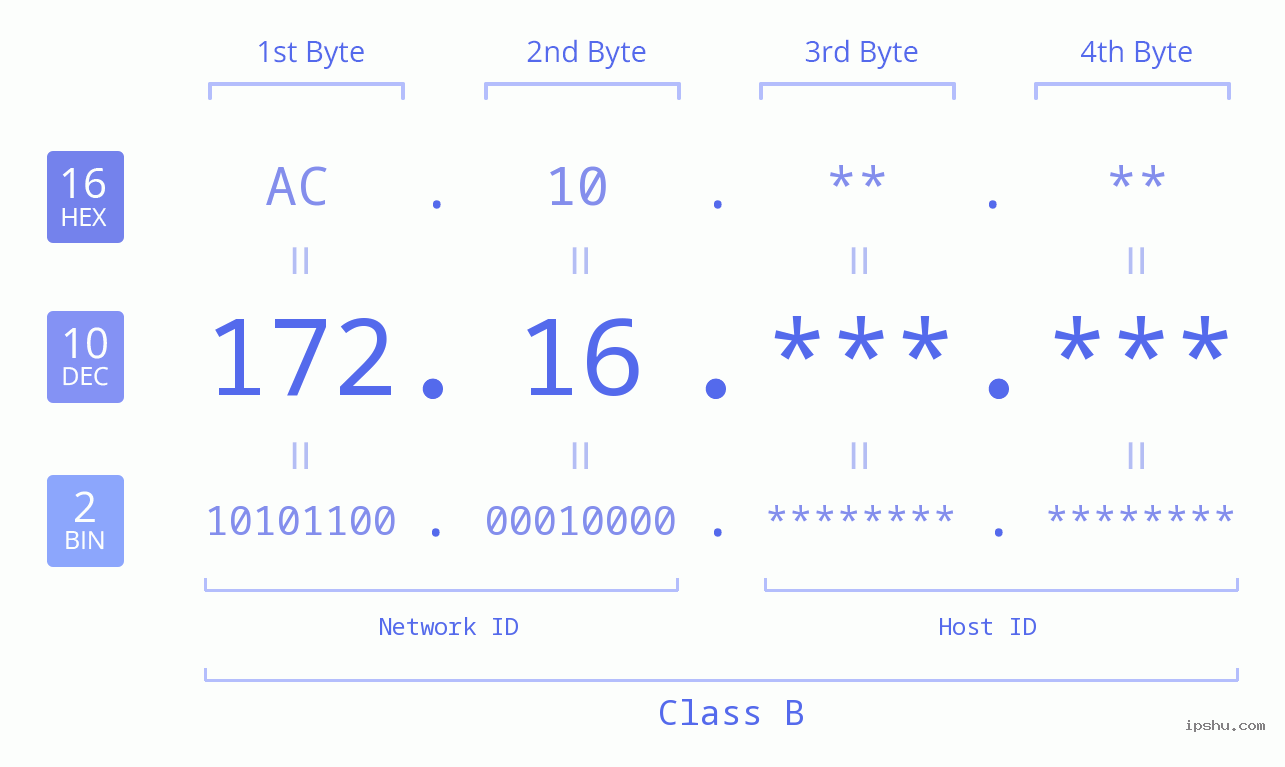
1. The Range of 172.16.0.0/12
172.16.0.0/12 is a CIDR (Classless Inter-Domain Routing) notation used to describe an IP address range.
Network Address: 172.16.0.0
Subnet Mask: 255.240.0.0 or /12
Address Range: 172.16.0.0 to 172.31.255.255
Total Number of Addresses: 1,048,576 (2^20 addresses)

2. Uses of 172.16.0.0/12
IP addresses within the 172.16.0.0/12 range are primarily used for communication between devices within a local area network (LAN). For instance, in a home network, a router may assign IP addresses from this range to various devices such as smartphones, computers, and smart TVs. This allows these devices to communicate with each other and share resources like files and printers within the LAN.
3. How to Configure Router's IP Address to 172.16.42.1
Step 1: Connect to the Router Network.
If using a wireless connection, find the router's SSID in the WiFi settings on your device, and enter the correct password to connect; If using a wired connection, connect your device to the router’s LAN port with an Ethernet cable. Ensure the cable is properly plugged in and secure.
Step 2: Open a Browser.
Launch any web browser, such as Chrome, Firefox, Safari, Baidu, or others.
Step 3: Enter the Router’s Default Login Address.
In the browser’s address bar, type in the router’s login address (e.g., 192.168.0.1 or 192.168.1.1) and press Enter.
Step 4: Enter Username and Password.
The browser will redirect to a login page where you need to enter the correct username and password. Typically, the username is “admin,” and the password may be “admin,” empty, or a customized password. Enter the credentials and click the login button.
Step 5: Access the Router Admin Panel.
Upon successful login, you will enter the router’s admin panel, where you can see various settings options. Look for “LAN settings” or a similar option to change the router’s IP address.
Step 6: Change the Router IP Address.
In the LAN settings page, find the current IP address settings and change it to one within the 172.16.0.0/12 range, such as 172.16.42.1, and set the subnet mask to 255.240.0.0. This ensures the router’s IP address is within the 172.16.0.0/12 subnet, allowing other devices on the same subnet to communicate properly.
Step 7: Save Changes.
After changing the IP address and subnet mask, look for a “Save” or “Apply Changes” button at the bottom or side of the page and click it to save the settings.
Step 8: Restart the Router.
Some routers will prompt you to restart after saving changes. If needed, click the “Restart” button to ensure the new IP address takes effect.

4. Comparison of 172.16.0.0/12 with Other Private Address Ranges
- 10.0.0.0/8: The largest private address range with 16,777,216 addresses, ideal for large networks.
- 172.16.0.0/12: A substantial address range with 1,048,576 addresses, suitable for medium-sized enterprises or organizations.
- 192.168.0.0/16: A smaller but flexible range with 65,536 addresses, ideal for home and small business networks.